

How To Make A Medibang Template
 Let's depict manga
I volition explain the basics of drawing cartoons using MediBang Pigment.
Betoken
Although I will not explain in this tutorial, MediBang Paint has a service called "cloud project" to draw comics in earnest. (To use the cloud projection, user registration to MediBang is necessary.)
Let'south use "Comic guide"
"Comic guide" is a guide line when press manga. When opening a new sheet as "manga manuscript", "Comic guide" will be displayed automatically.
To open up the canvas every bit "manga manuscript", open the "New Image" dialog with "File" → "New" in the carte du jour and create a canvas from the "Comic (i)" tab.
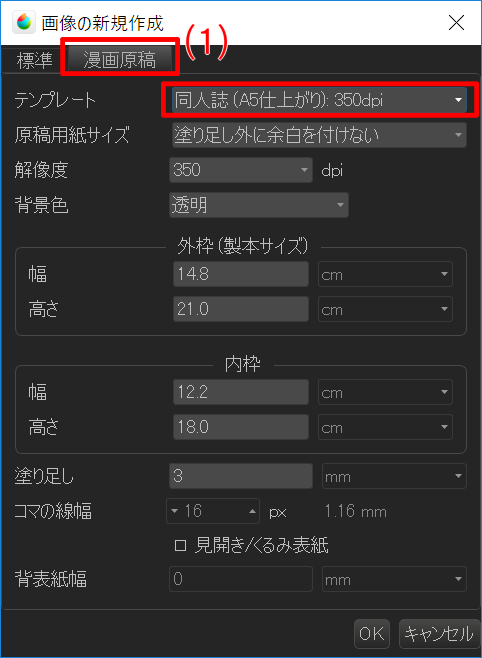
Let's create a canvas past selecting "Doujinshi (A5 finished): 350 dpi" as a template on the "Comic" tab.
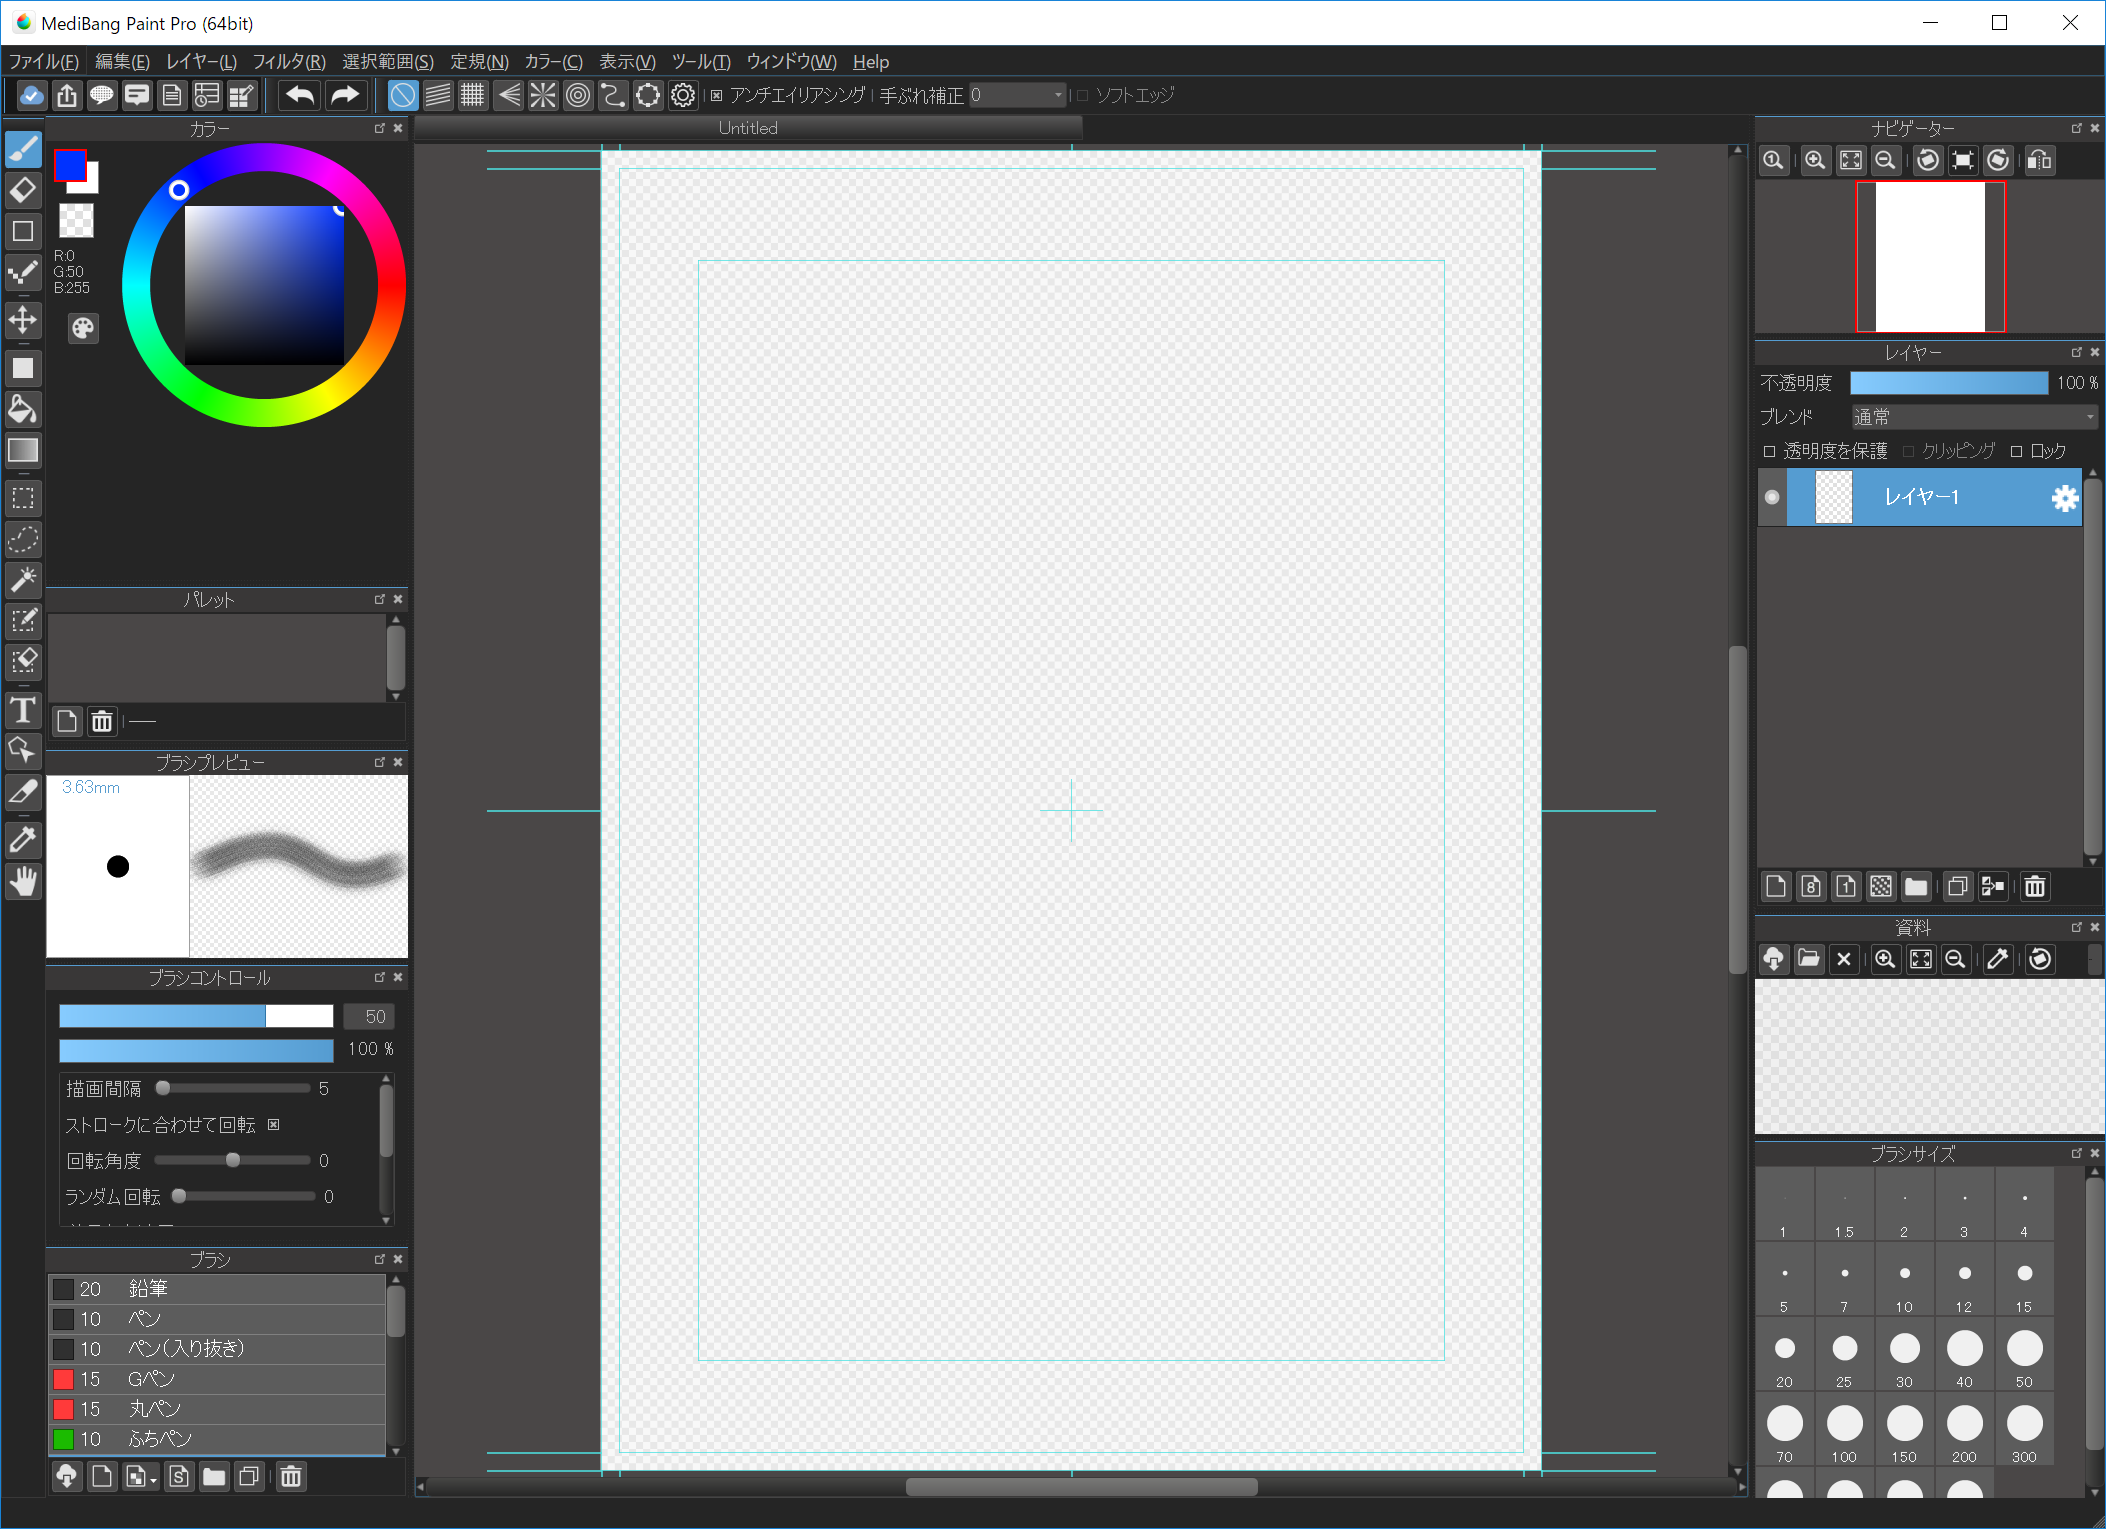
A canvas of "Comic" was opened. This light blueish color guideline is "Comic guide". (Please see hither for the meaning of the lines of the guideline.)
Tips
When checking "Spread / Embrace page" at the time of new creation, the spread canvas volition open.
Tips
"Comic guide" can be displayed / hidden at any time by "View" → "Bear witness Comic Guide Lines" of the menu. You can also change the setting by "View" → "Comic Guide Lines Settings".
I will explain "Panel Divide" which is indispensable process for drawing cartoons. You lot can hands "Panel Split" with MediBang Pigment.
Console Divide
Kickoff, add together "Panel Textile" to the canvas with "Layer" → "Add together Panel Material" in the carte.
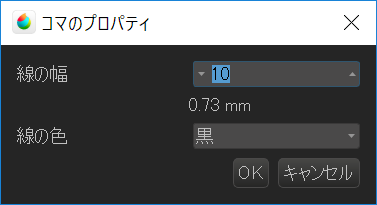
The "Comic Panel Property" dialog is displayed and you can set the "Panel Material" to be added. Please press OK equally it is hither.
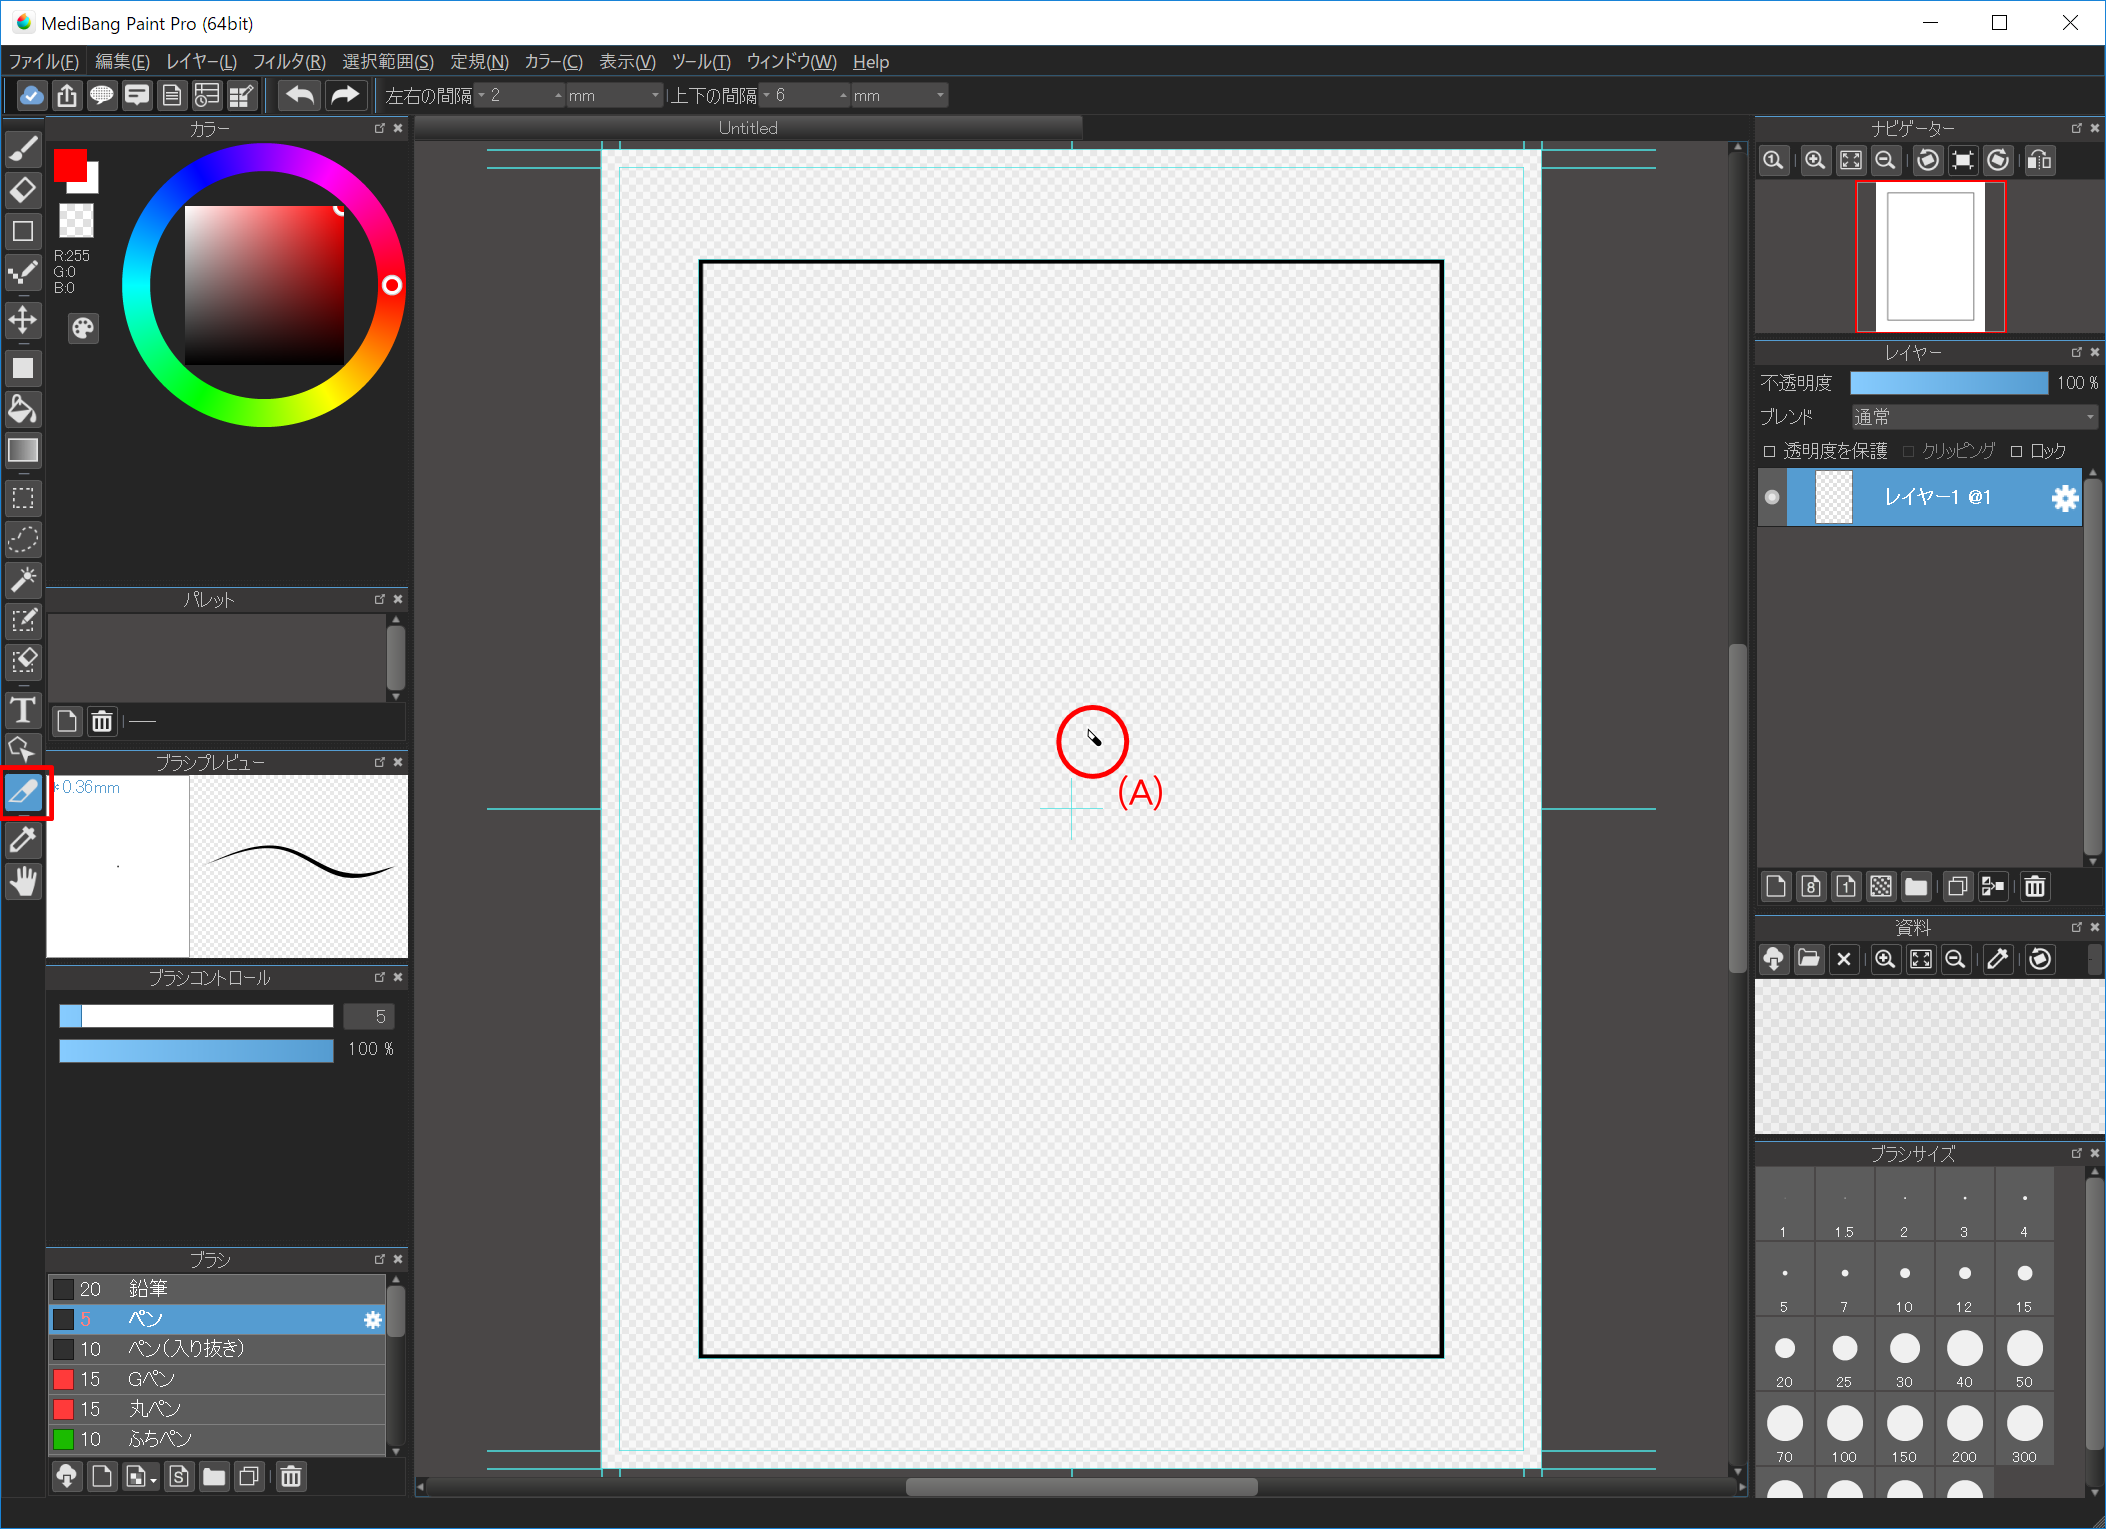
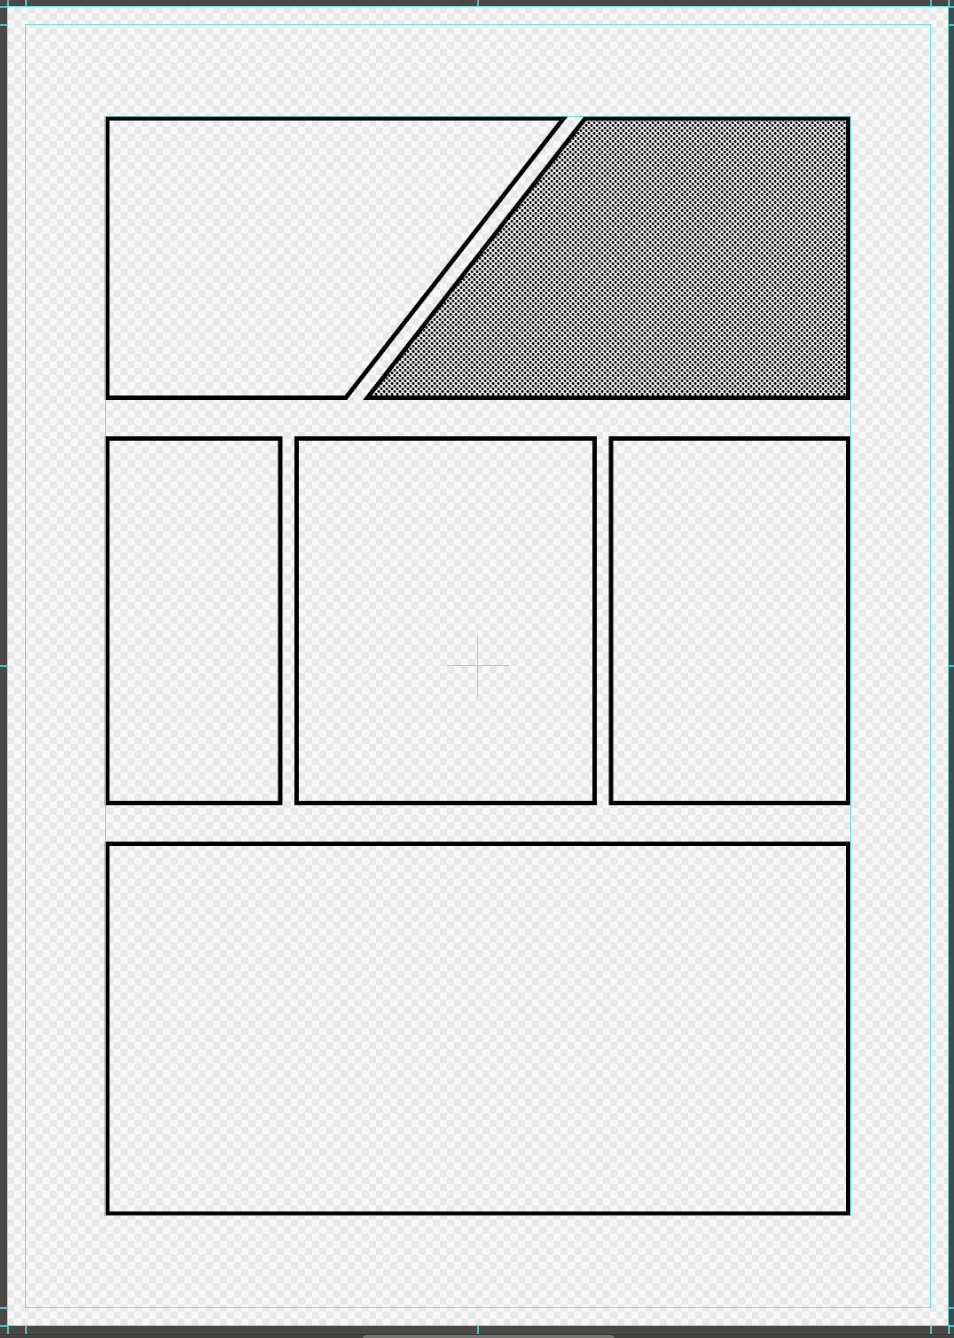
"Panel Material" is added according to the inner frame of "Comic guide" and the cursor changes to the shape of the cutter (A). ("Split up Tool" is selected.)
With this "Divide Tool" selected, you can "Panel Split up" past cutting "Panel Material".
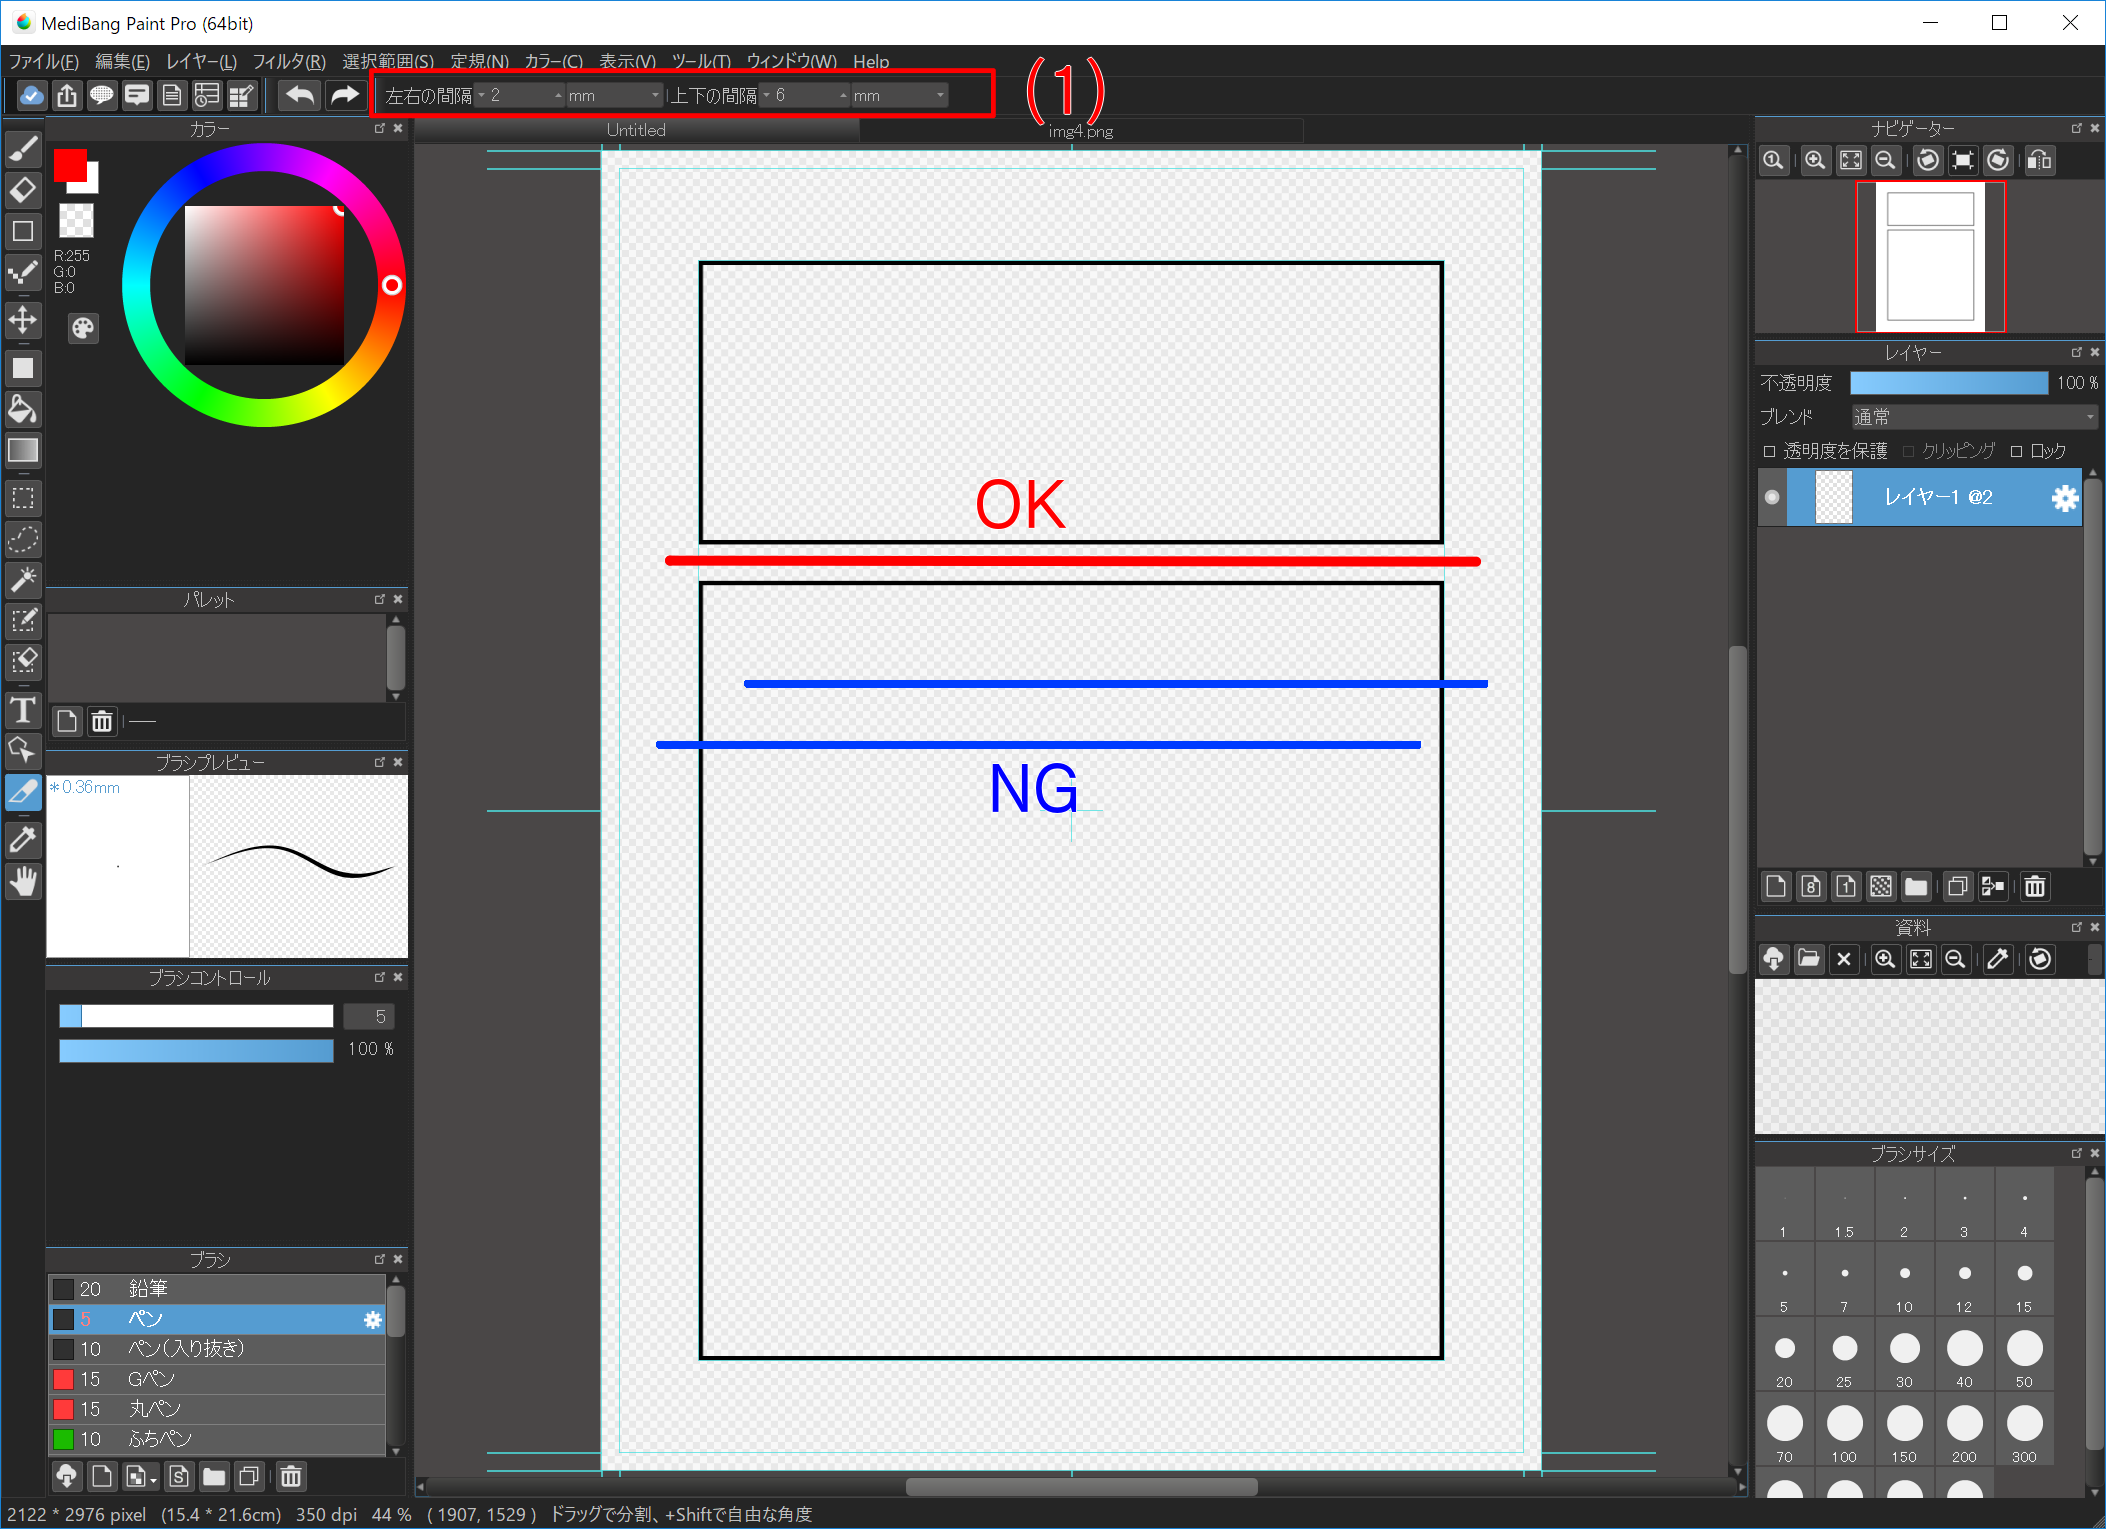
Let's cutting the panel next to it similar a red line.
When cutting a piece, please cutting it then as to dissever the piece. When the panel tin can not be divided properly like the bluish line, the panel volition not pause. In the (1) toolbar, you can besides set the vertical and horizontal spacing when splitting a panel.
If you want to split up panel diagonally, please hold down Shift primal and intermission console.
Permit's divide the console accordingly. When I accidentally devide a piece, It's expected "Disengage".
Transforming Panels
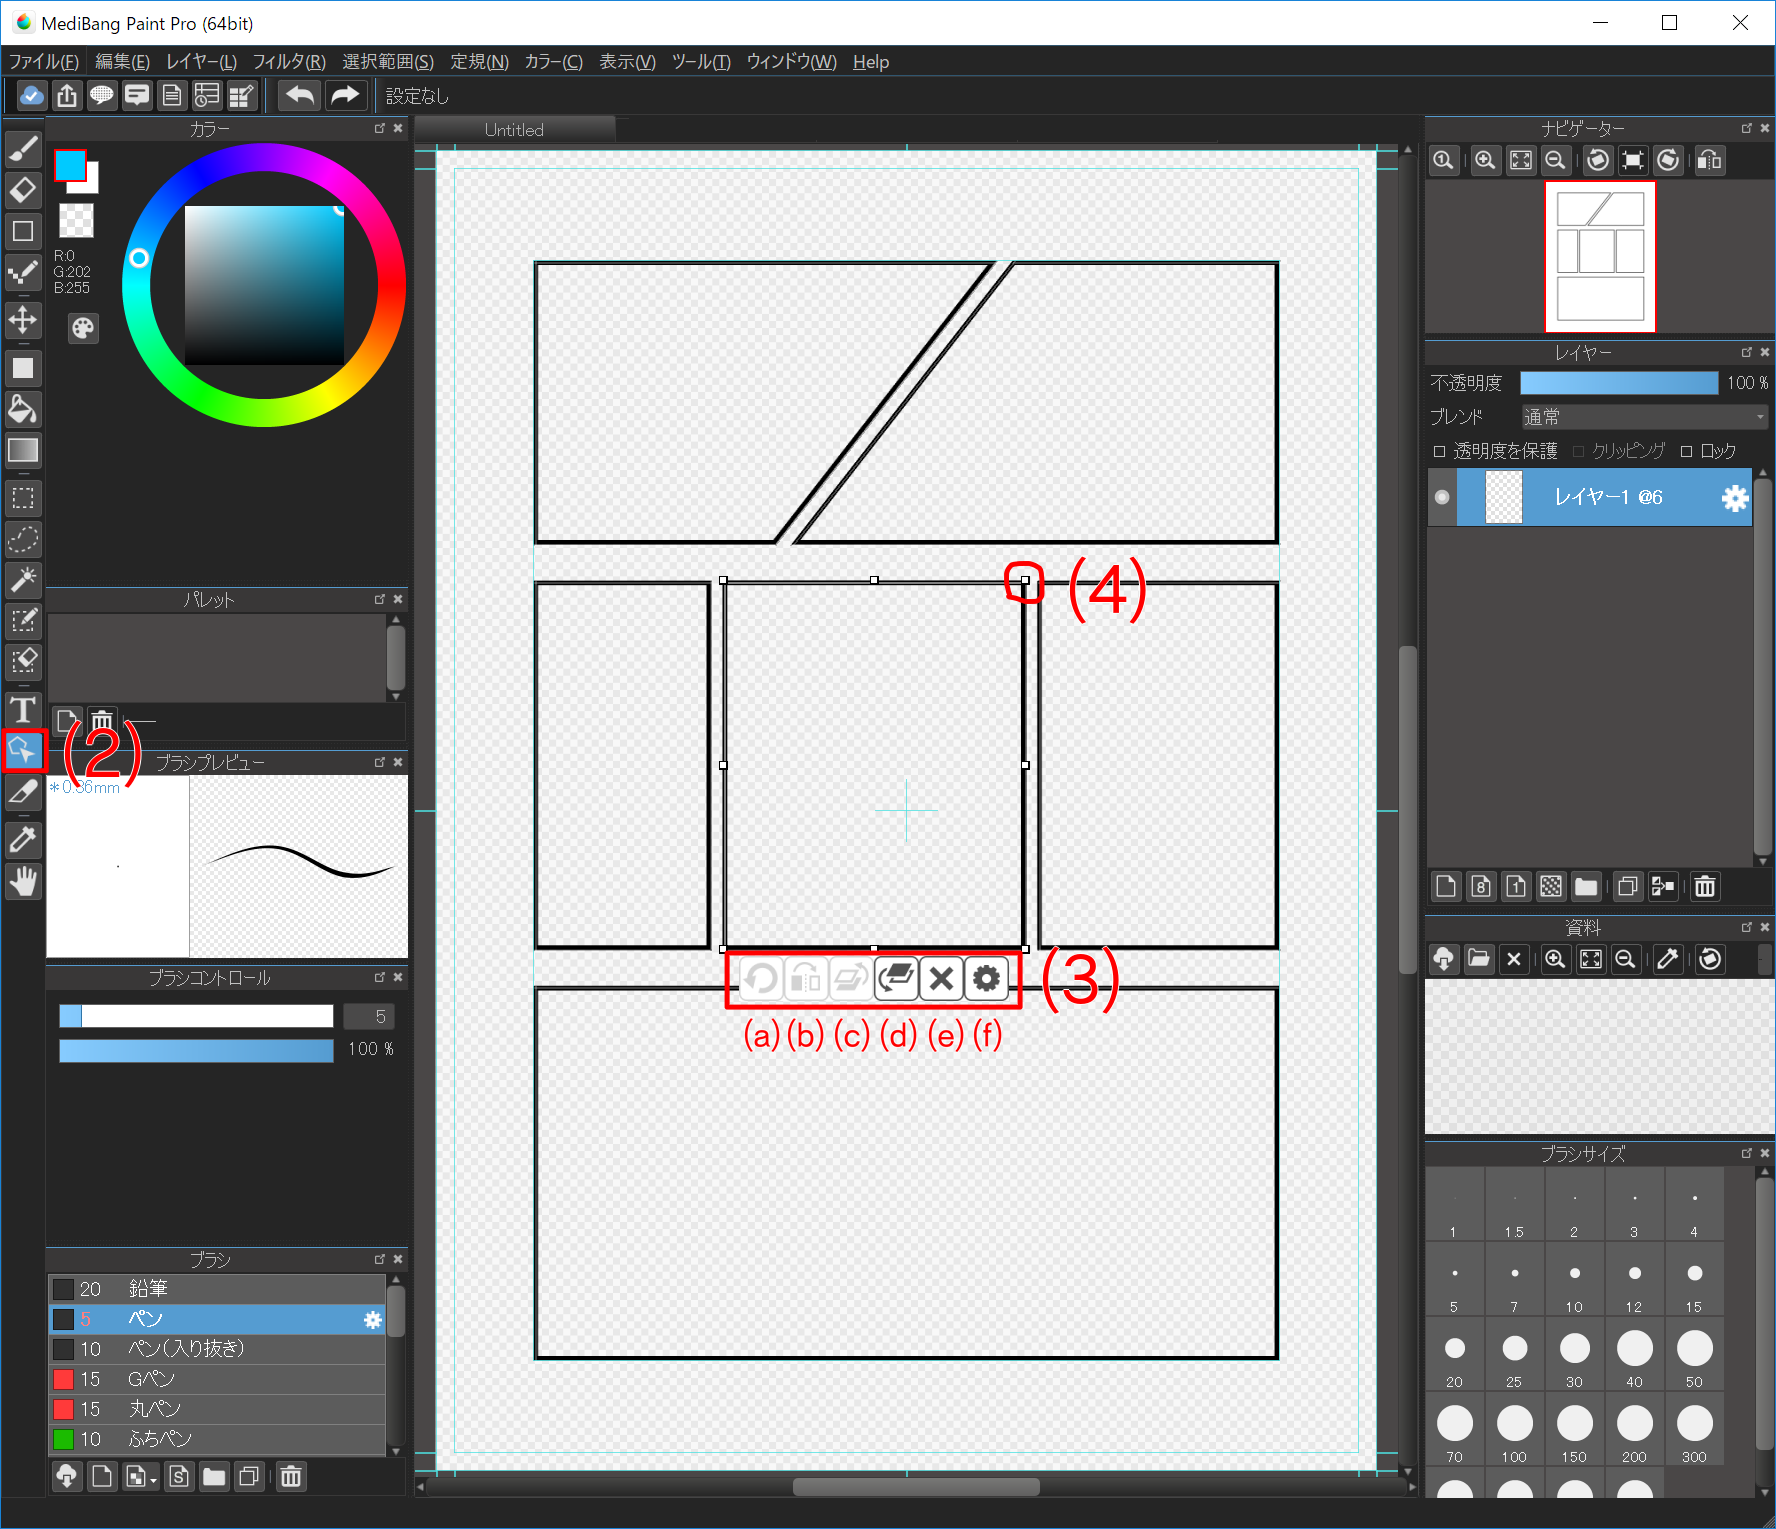
To Transform / Move some Panels, use the "Operation Tool".
- (a)・(b)
- This role tin non be used with "Panel Split up".
- (c)
- This button changes the overlapping order of "Console". If more than than 1 "Panel" is overlapped, rearrange this "Panel" so that information technology is displayed one above.
- (d)
- This button changes the overlapping order of "Panel". If more than one "Panel" overlaps, rearrange this "Panel" so that it is displayed one below.
- (e)
- It is a push button to delete "Panel".
- (f)
- It is a push button to change the property of "Panel". When pressed, a dialog for changing the line width and color of "Panel" opens.
Select "Operation Tool (2)", click "Panel" you desire to operate, "Toolbar (3)" will be displayed under "Panel". Functioning of "Console" is done by grasping "handle (four)" around "Panel".
If you want to erase part of "Panel" please see here.
Tips
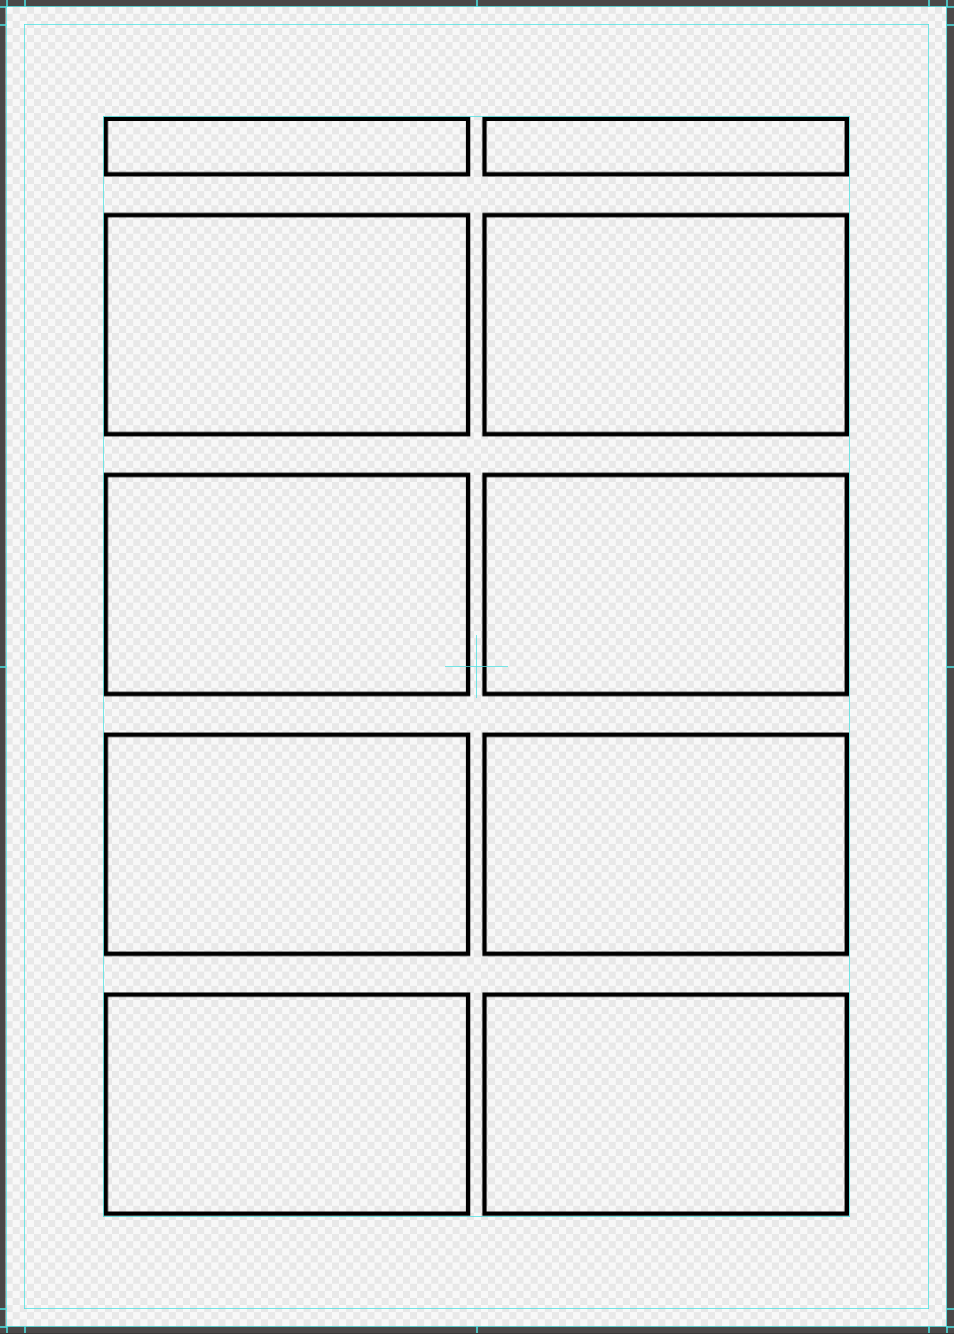
If you want to divide "Panel" evenly, permit's use "Layer" -> "Textile" -> "Split" in the bill of fare. Since this function as divides the currently active "Panel", execute with the "Panel" you want to split with the performance tool selected.
If you lot utilise it successfully, you lot can likewise "Console Divide" for "4-frame cartoon".
Allow's utilise "material"
In MediBang Paint, you can easily paste materials such every bit tone on your manga.
Please refer to here for basic usage of the material.
Let's try it
First, add together a new layer for pasting the textile. Next, permit'south select the appropriate frame with "MagicWand Tool" and open the "Fabric Dialog" by pressing the "Open up Material Dialog" button.
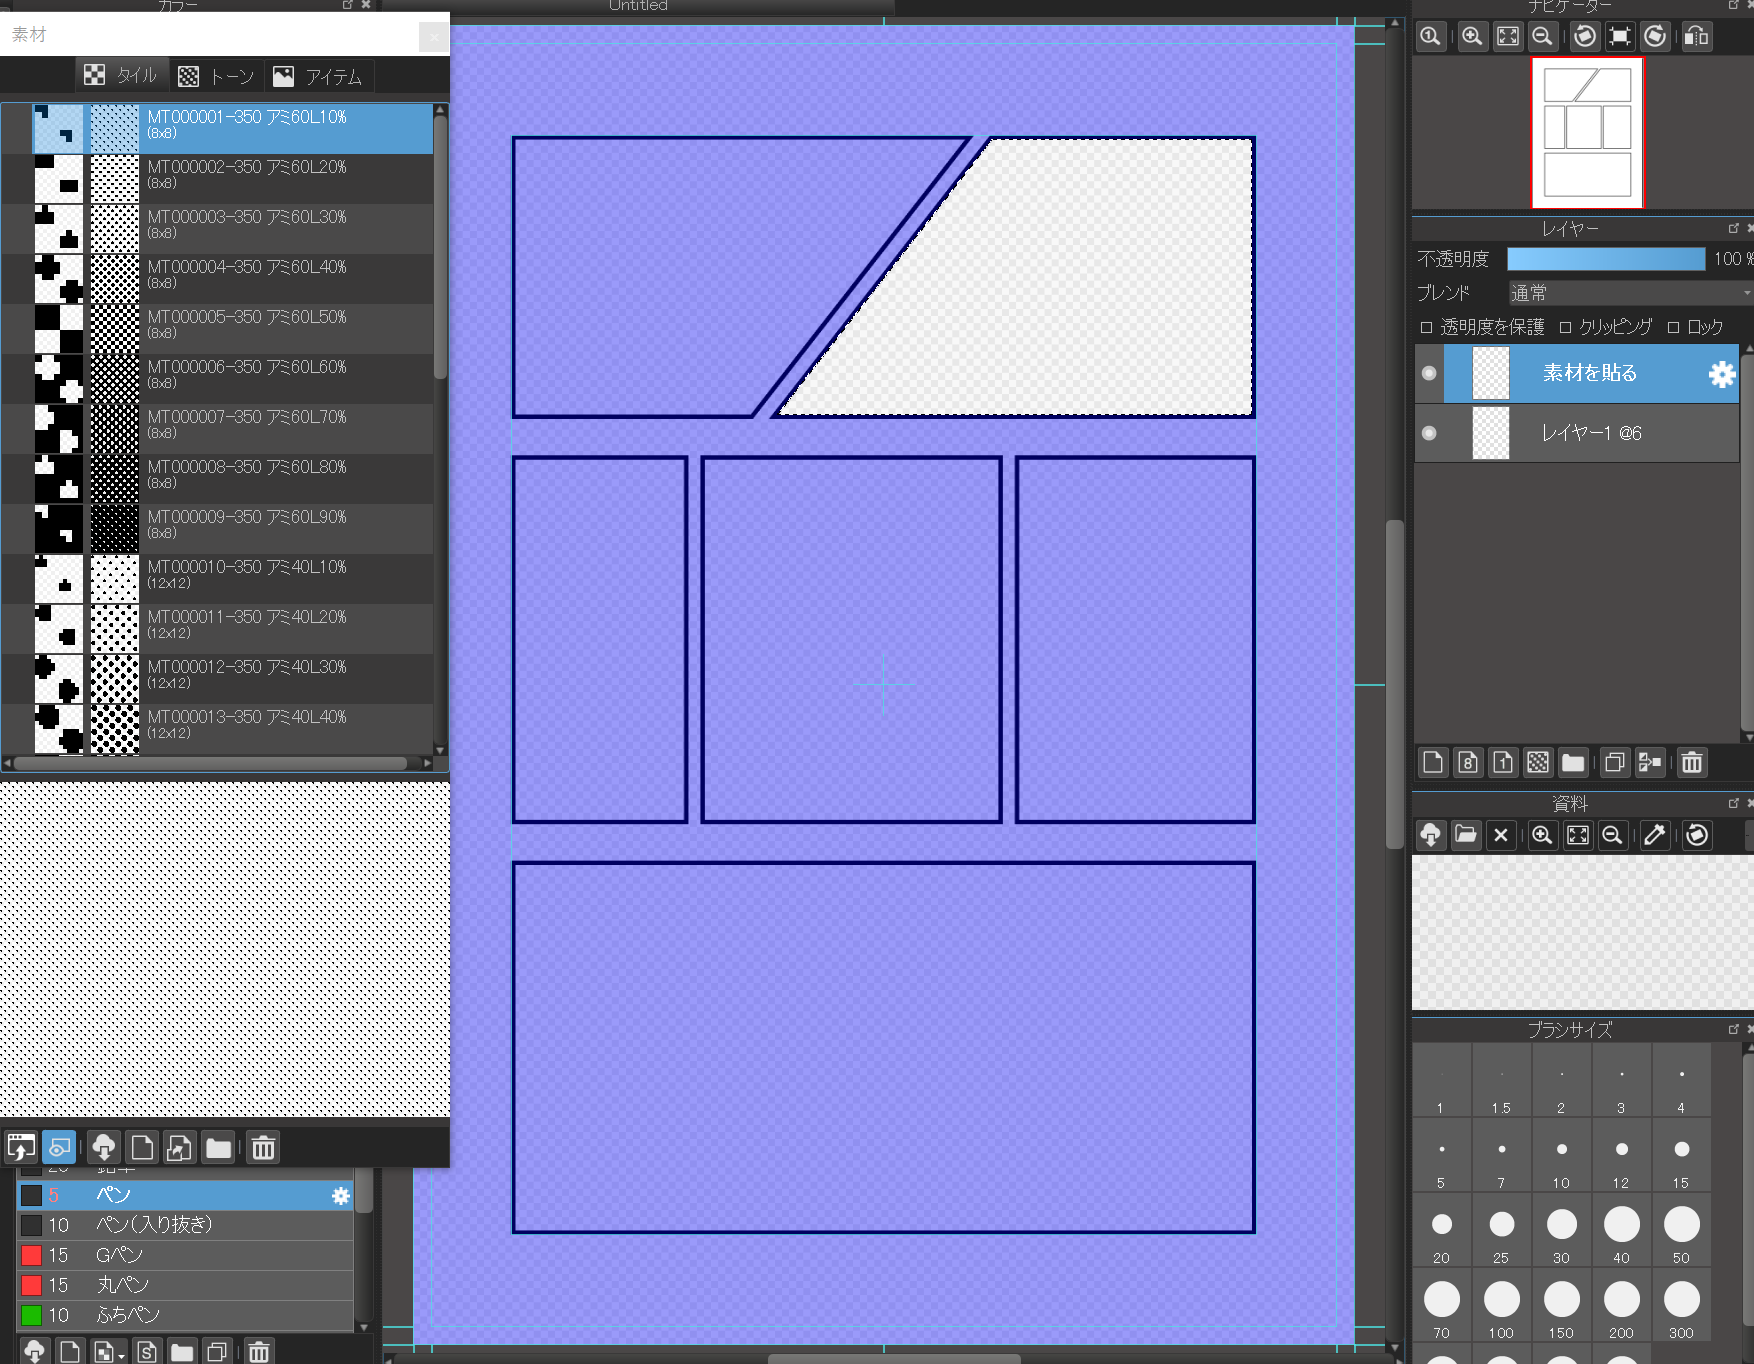
When "Fabric Dialog" opens, drag and drib the tiles and tones yous want to utilize onto the canvas.

A bar is displayed at the bottom of the main window where y'all can fix the bending and magnification of the material. If you fix an advisable value here and press the "OK" button, pasting of the material is confirmed. If you paste information technology correctly, if you release the selection, the fabric is stuck in the "Panel" neatly.
In this mode, by pasting the material after creating the selection range, you can paste the material only to the place yous desire to paste.
Tips
When sharpening the tone it is convenient to utilise transparent color.
Sharpen tone
Let'due south copy with the "Text Tool"
Past using "Text Tool", you lot can easily enter characters.
For the bones usage of "Text Tool" please refer to here.
Permit'south endeavor it
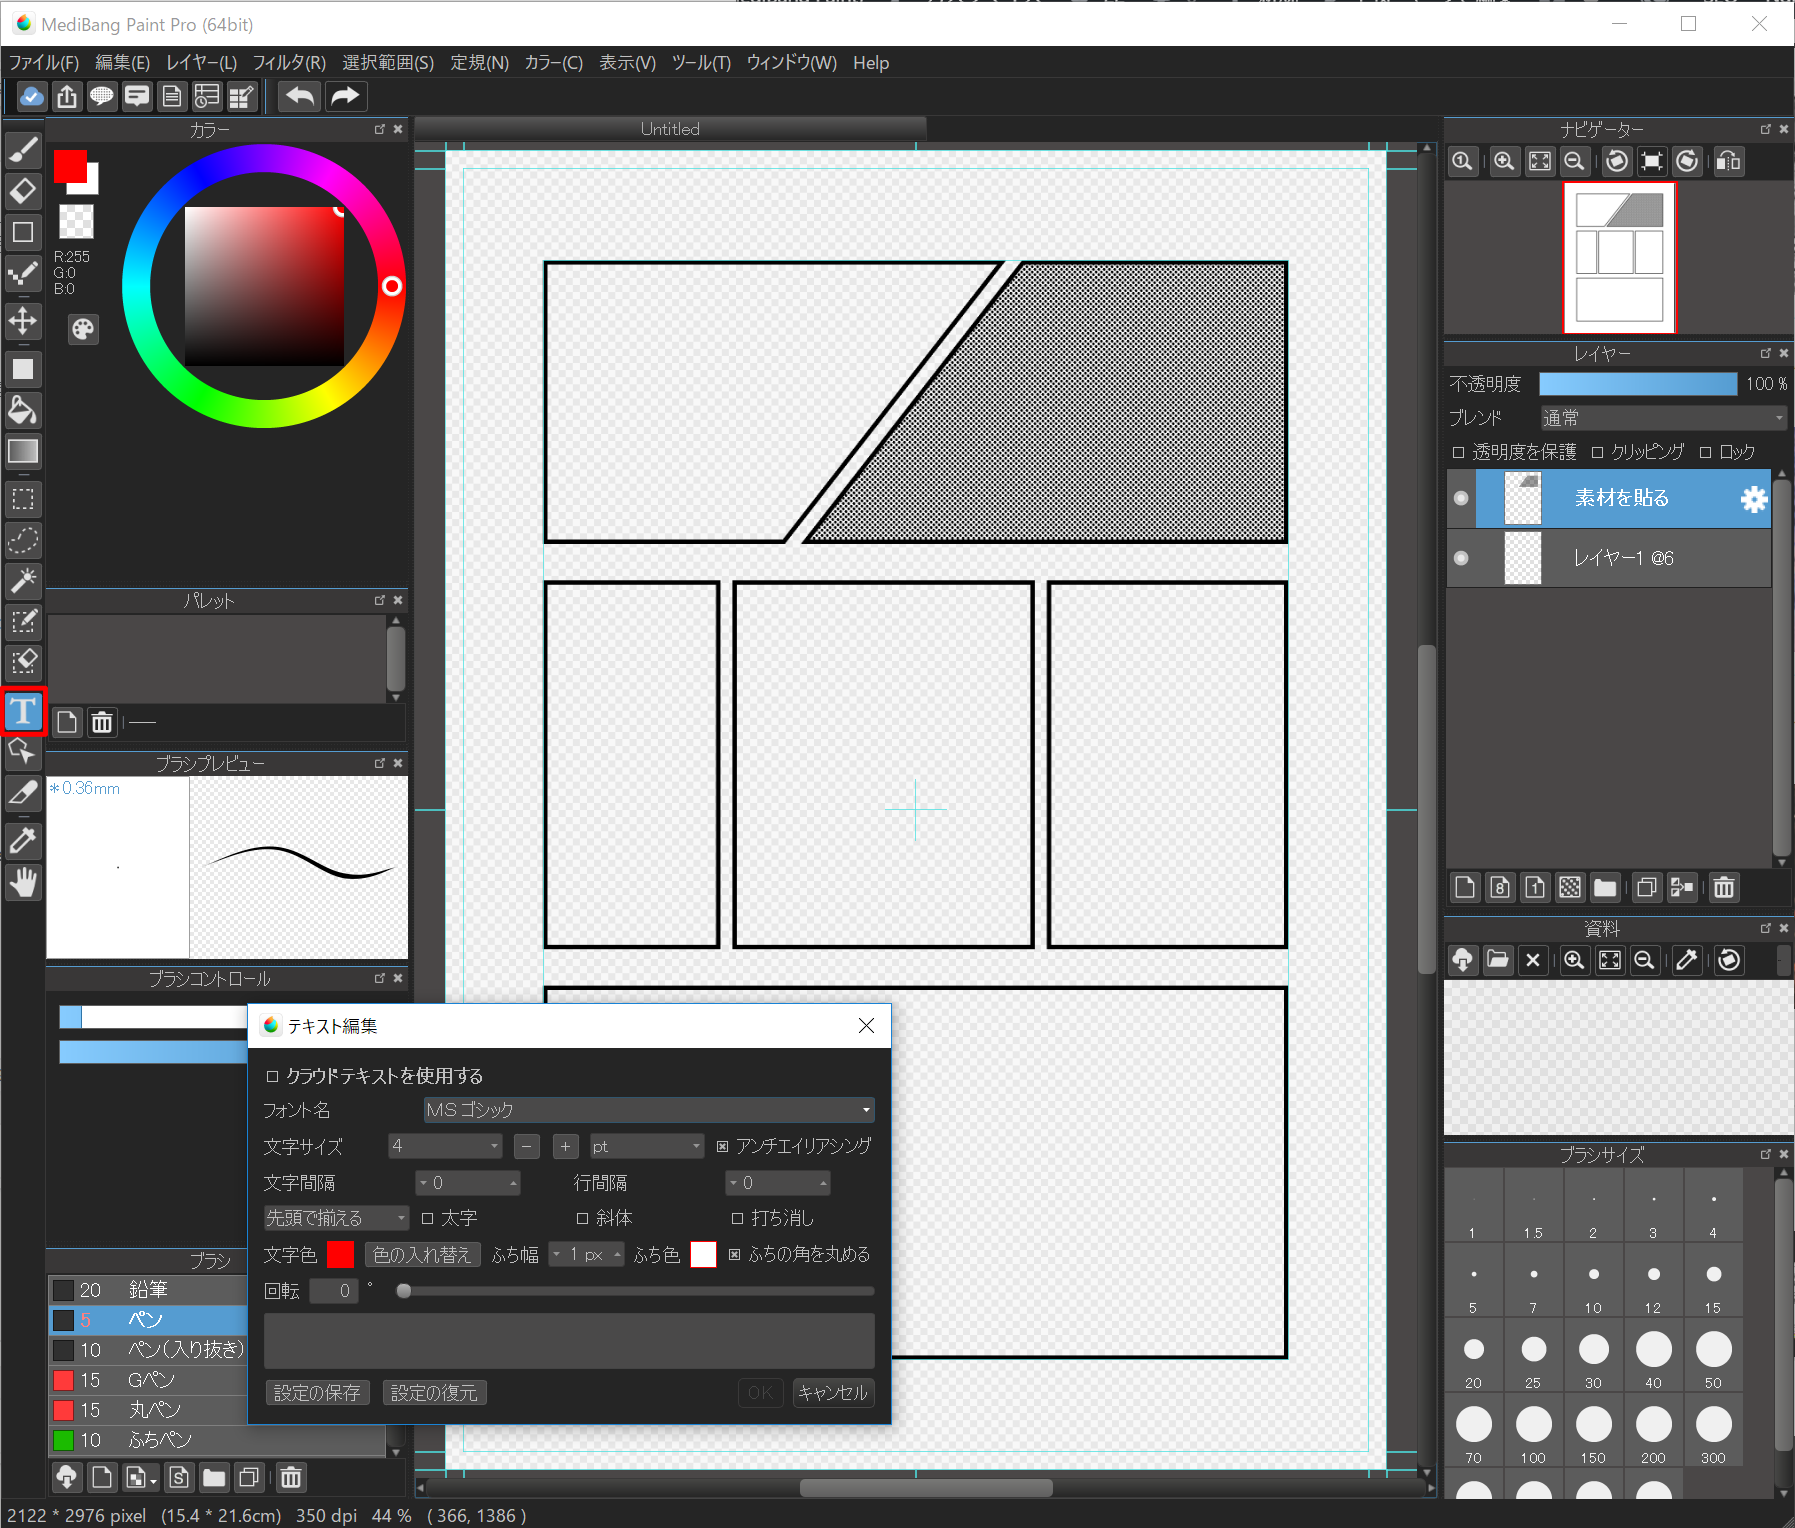
Select "Text Tool" from the toolbar on the left of the main window and click where y'all want to place the letters on the sail. The "Edit Text" dialog is displayed.
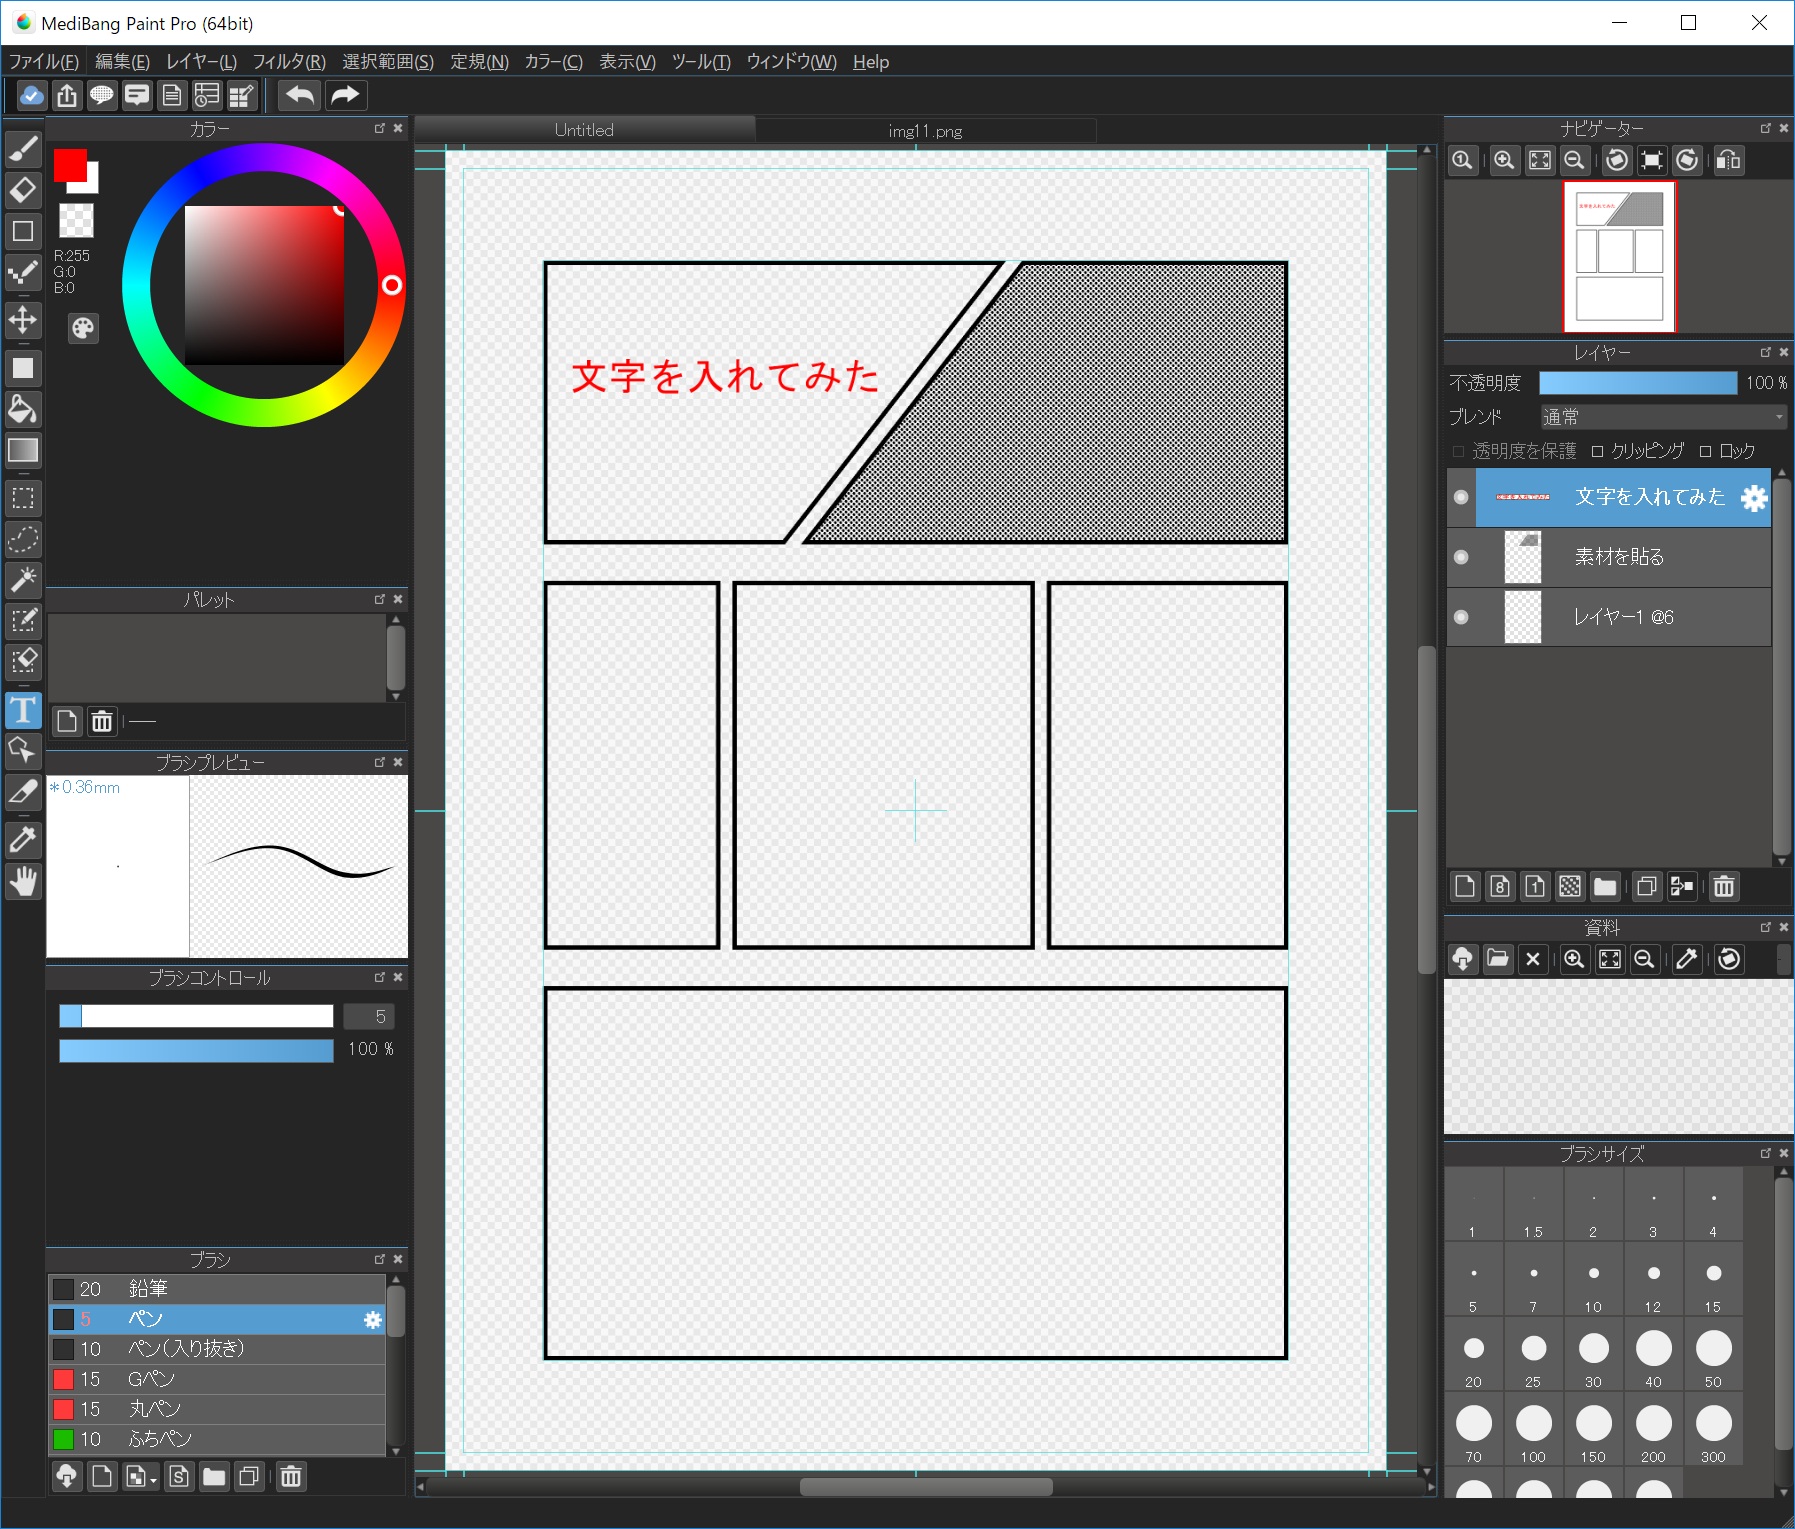
Afterwards entering the characters you want displayed on the canvas and pressing the OK push, the layer of text is added and the characters are displayed on the canvas.
This character tin be moved when "Text Tool" or "Move Tool" is selected.
Tips
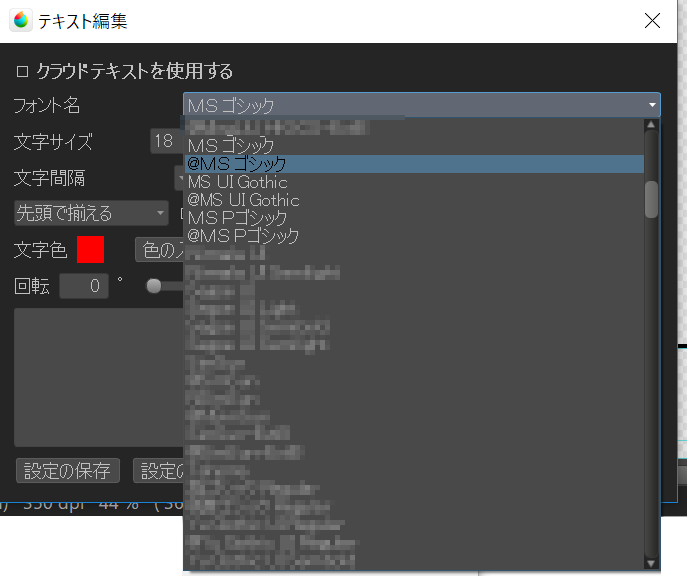
If you want to write text vertically using Windows fonts entered in the computer, using fonts with "@" at the beginning of the font name will be written vertically.
- PC
- iPad
- iPhone
- Android
How to utilise

How To Make A Medibang Template,
Source: https://medibangpaint.com/en/tutorial/pc/create-comics/
Posted by: andersonvearguat.blogspot.com
0 Response to "How To Make A Medibang Template"
Post a Comment